JJTober 2025 - Day 25: Thread
back to October 2025 art prompts
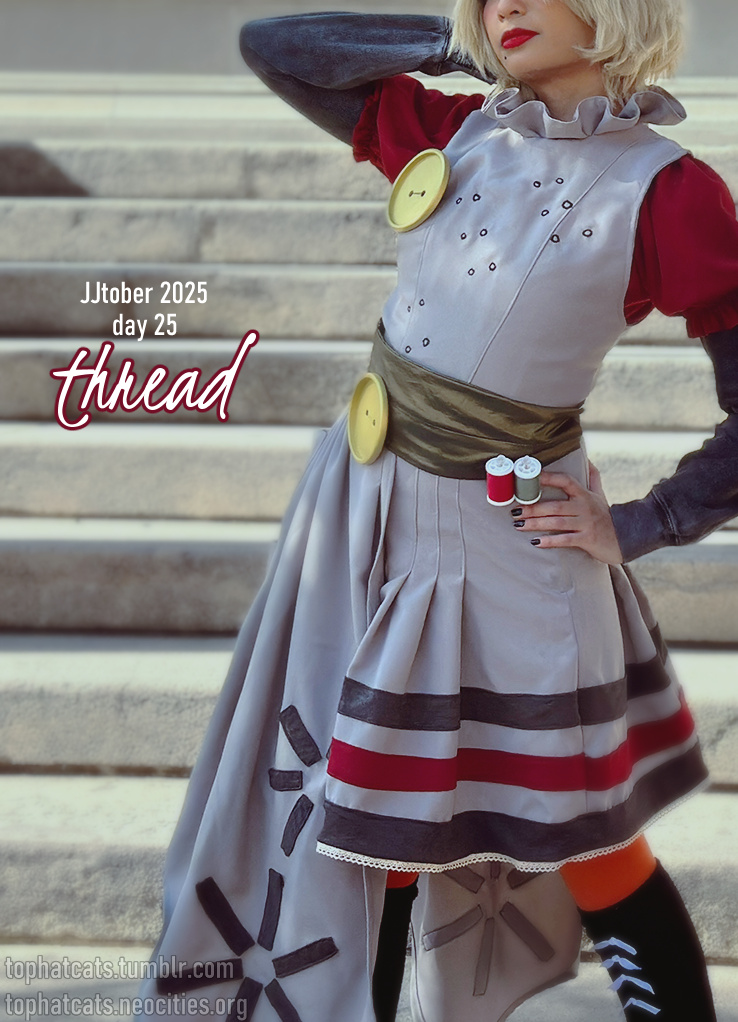
2023 Jack Jeanne cosplay
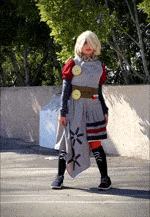
Quartz fall play - Fumi as the role of Mary Jane
by tophatcats
Overview
This writeup has been long overdue! Jack Jeanne is a game that is very dear to me, and I felt compelled to leave cosplay retirement to put this project together. I've been making cosplays and attending conventions between 2005 to 2019. It's way too strenuous of a hobby for me to keep up with nowadays, but I will break out my sewing machine for a fav on very very rare occasions.
This is my favorite cosplay to date in terms of construction quality and execution!
Timeline
- project start & end: October 9, 2023 – November 4, 2023
- main pattern draft completed: October 13
- main sewing completed October 23
- Worn to: Anime Pasadena 2023
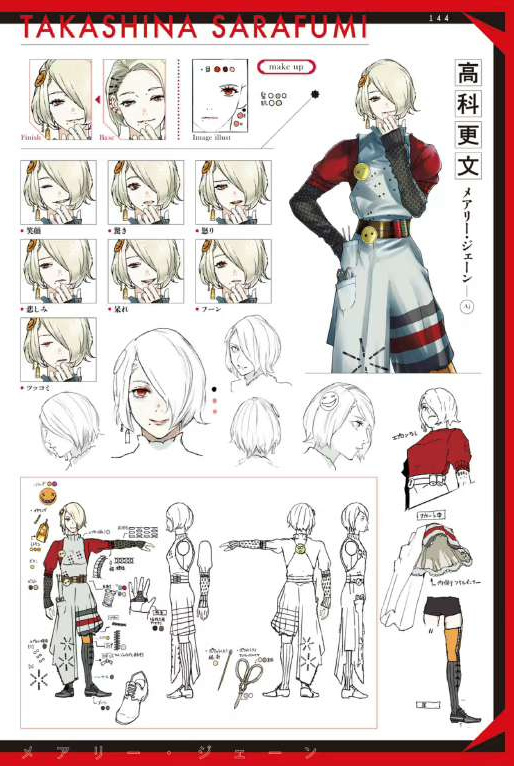
References
The 3D models from the dance have the design as a pair of pleated shorts with a side apron, so I went with that interpretation.

Click for full size. Art book snippet courtesy of the Jack Jeanne EN discord group. In-game screenshots are mine.
Construction
This section is very photo-heavy!
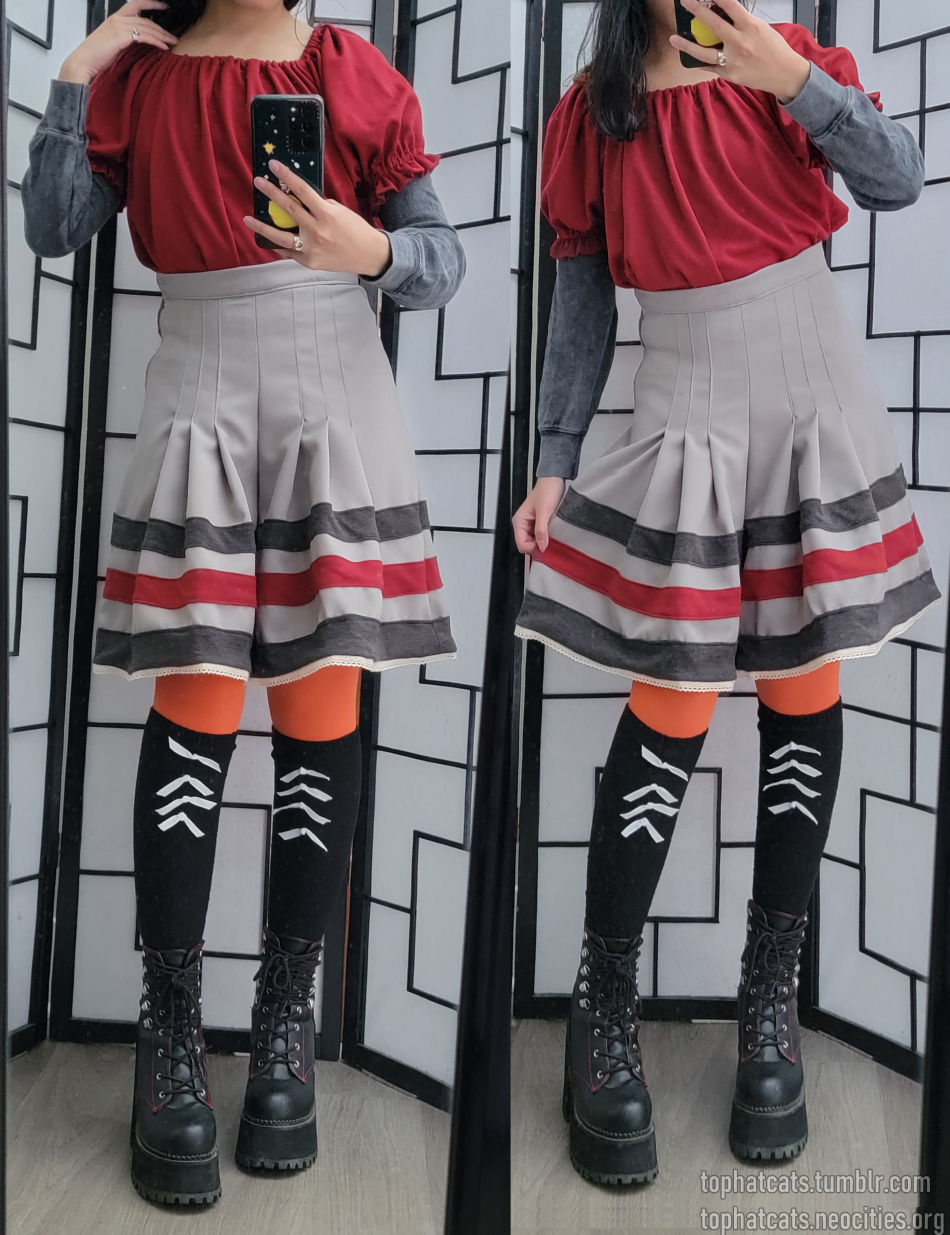
Undershirt & Blouse
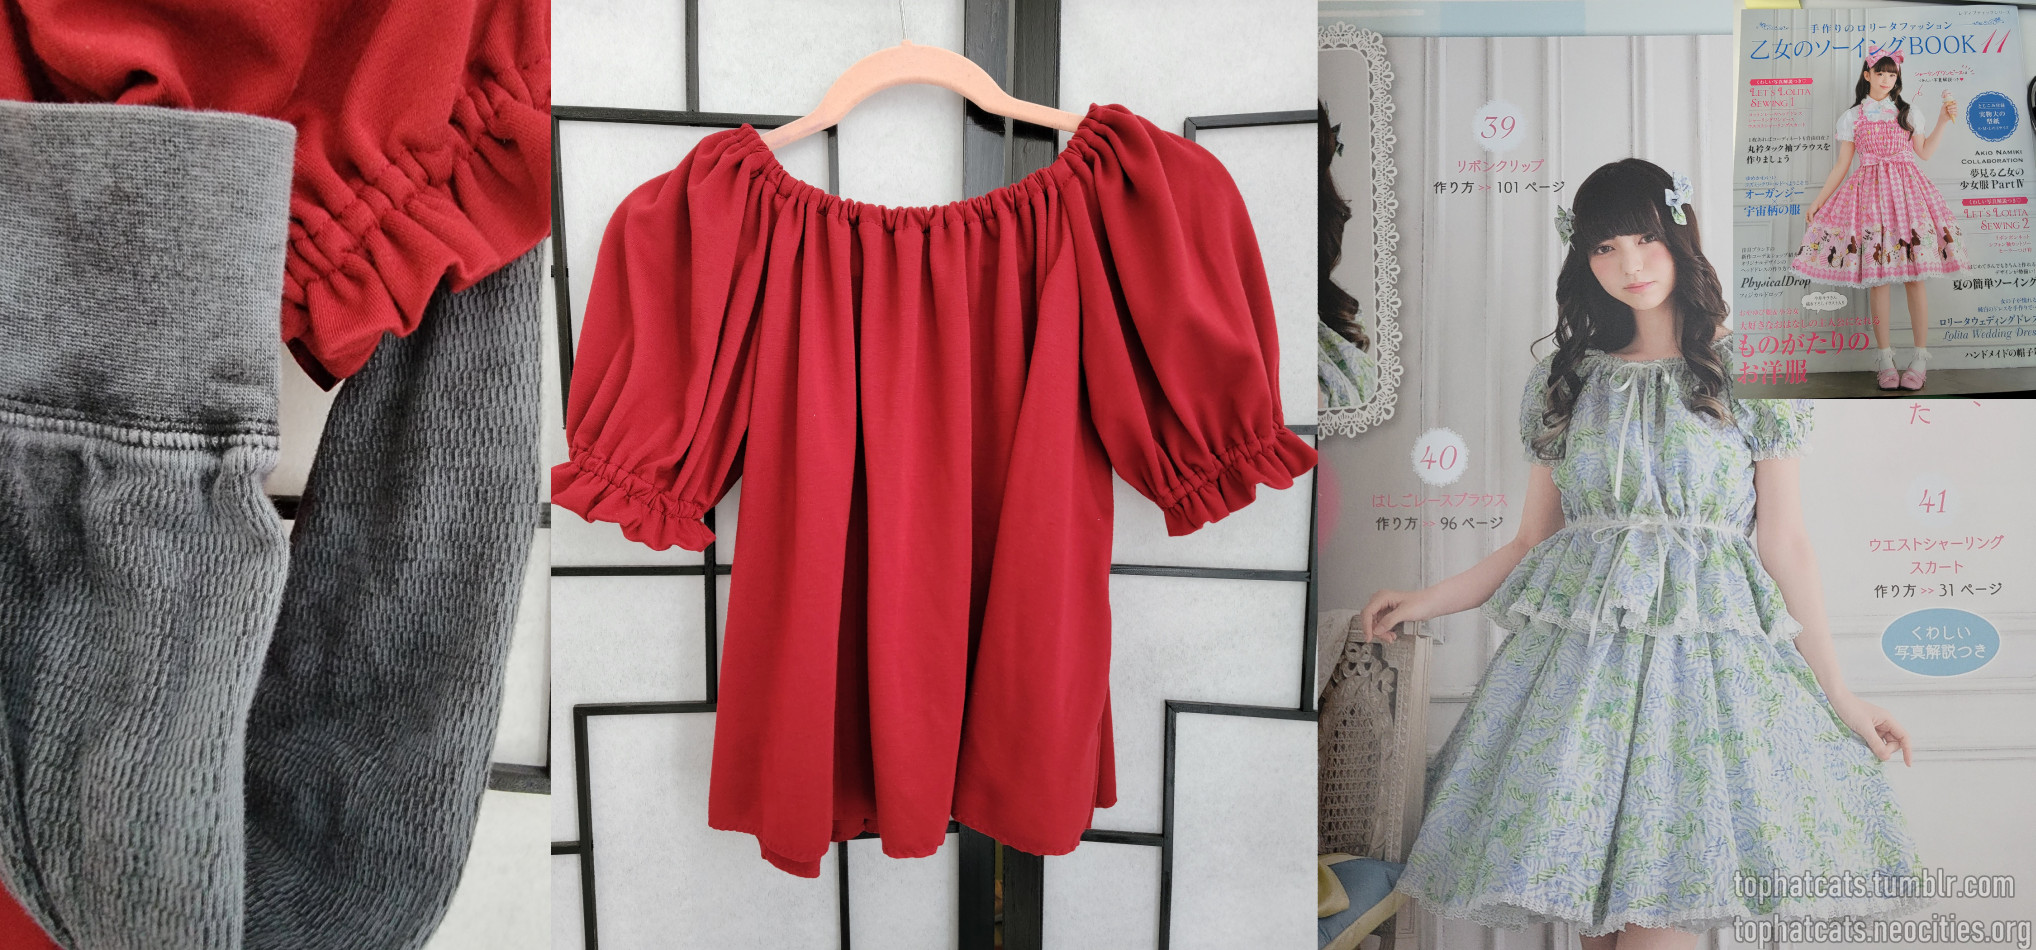
red blouse: Otome no Sewing volume 11, pattern 40
For the grey undershirt: I had this long sleeved shirt with the PERFECT fabric texture, sleeves, and color. I modified the fit on the torso area and neckline so they could layer easily with the other pieces without extra bulk.
For the red blouse, I went with this pattern from Otome no Sewing. The highlights were: puff sleeves that seemed easy to adjust, super easy raglan construction, free sizing on the bust/waist. I forewent the original underbust tie/drawstring since it wouldn’t be visible anyway. I adjusted the sleeve length and constructed the ruffle hem using the paperbag elastic band method from this tutorial. The ruffles turned out really nice!
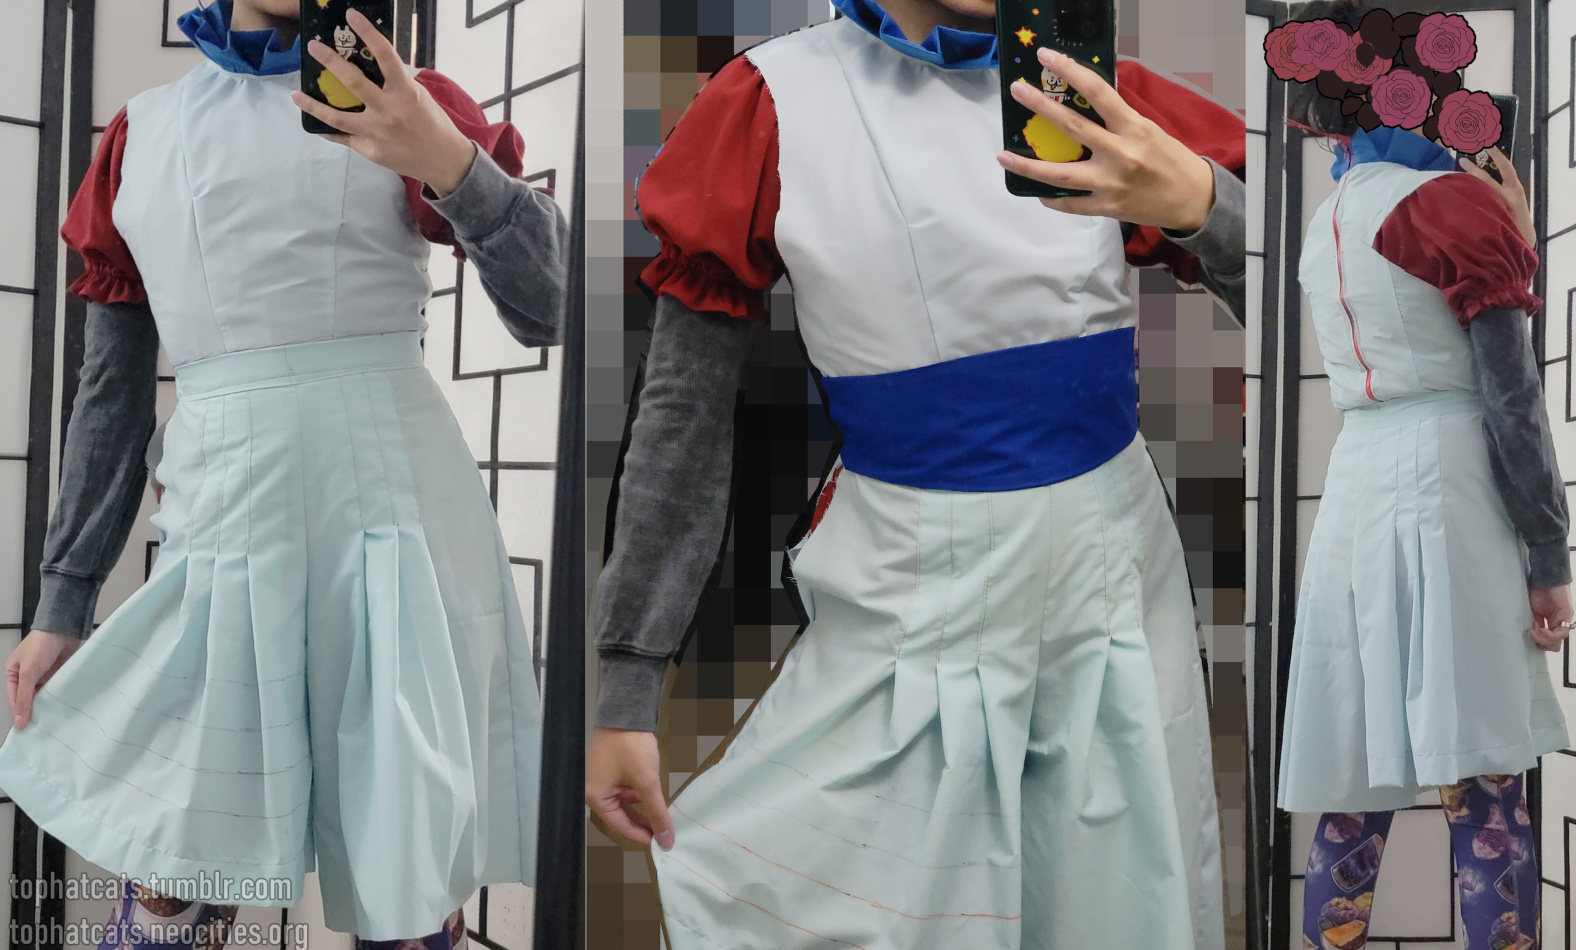
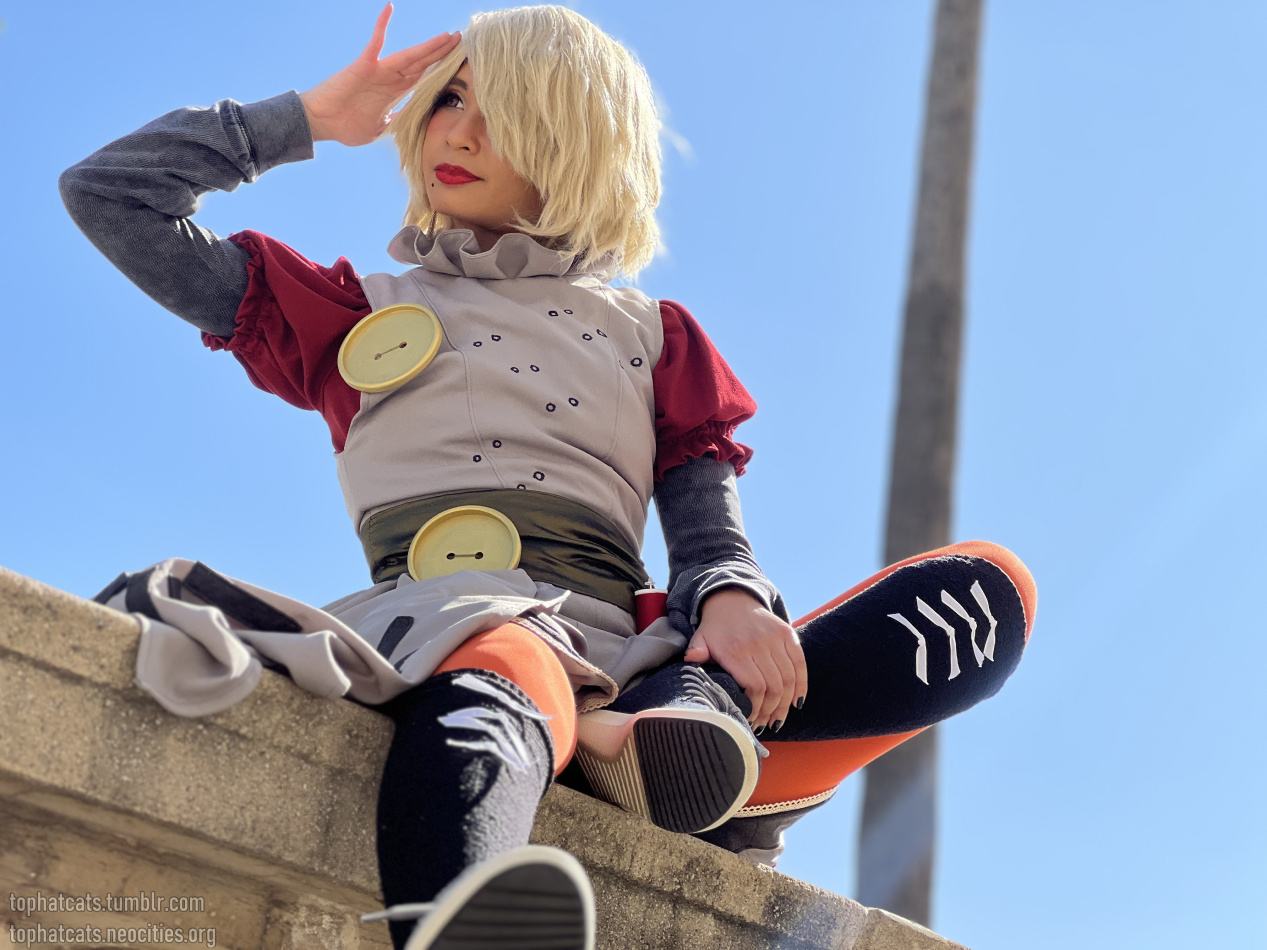
Pleated Shorts
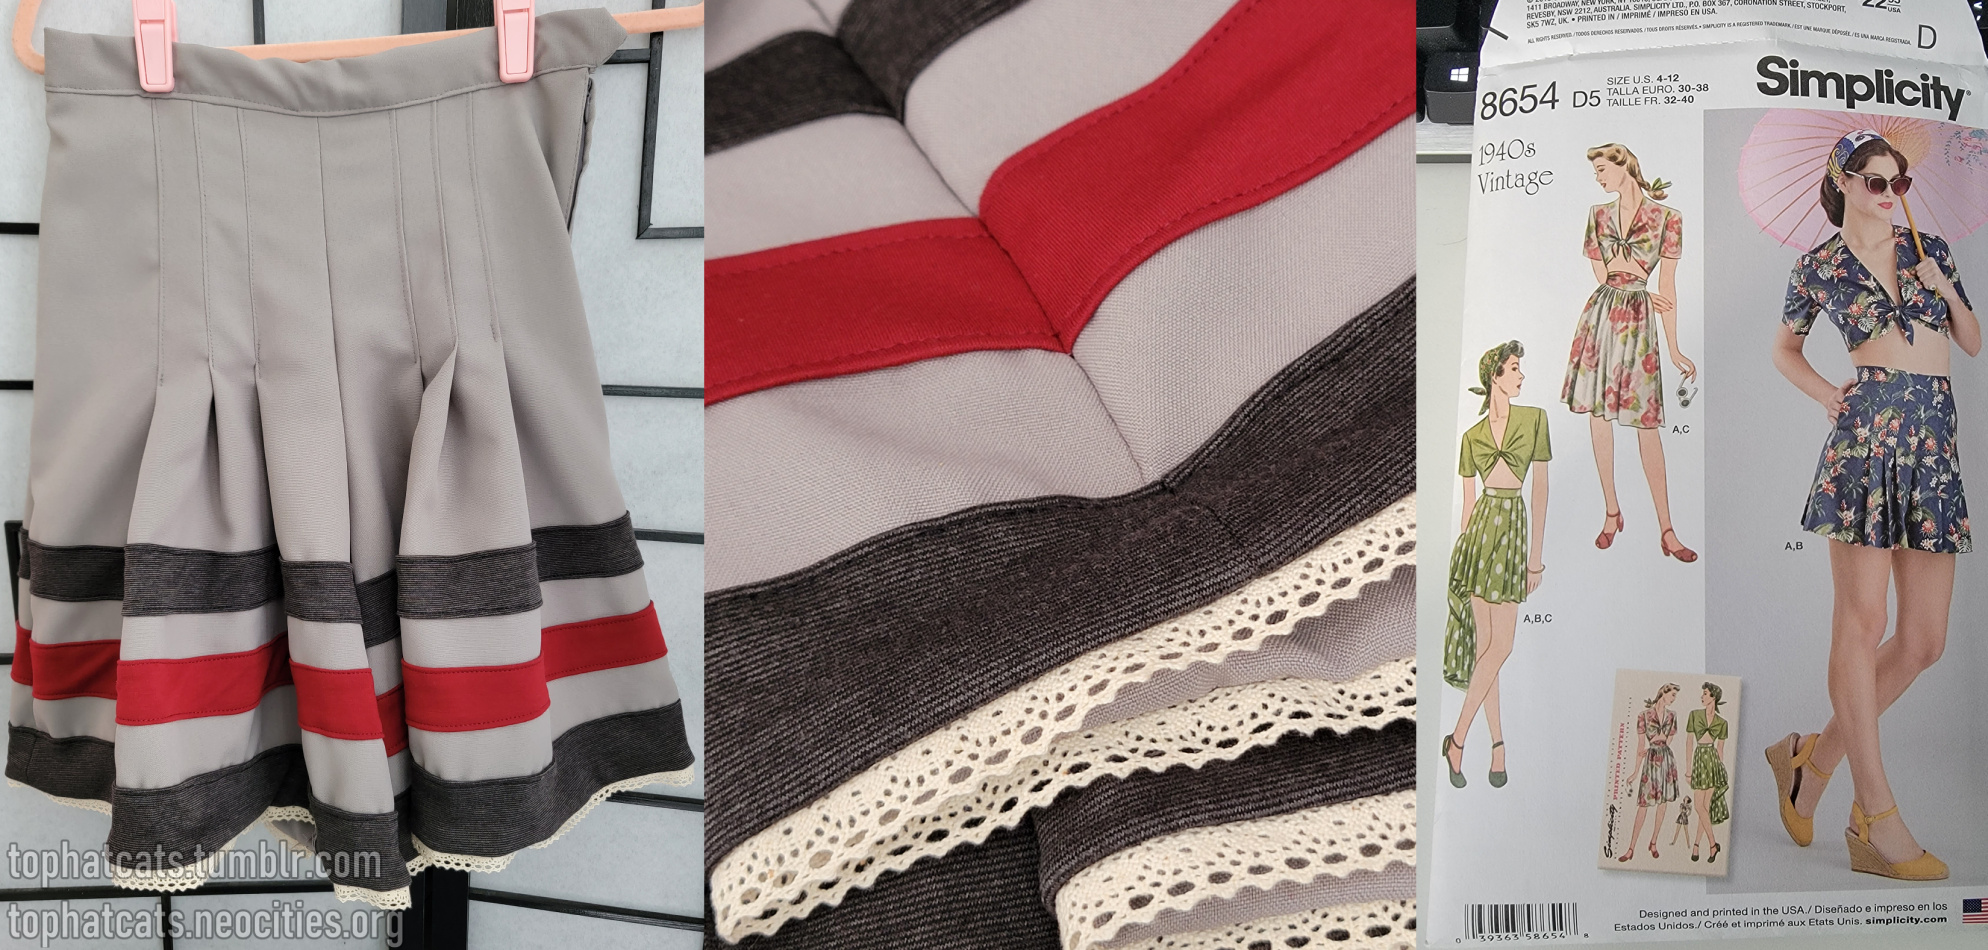
pleated shorts: vintage Simplicity pattern 8654
This pattern I bought on a whim was the perfect one for the job. Construction-wise, I only needed to adjust the length and account for top stitching the stripes, but basically these were the PERFECT PLEATS for the volume I wanted to achieve. I did a mockup with cheap broadcloth I had lying around to double check the fit and plan out the stripe placement. I ended up with 4cm height stripes spaced 4cm apart.
The upper and center stripes were topstitched to the front and back pattern pieces before I started assembling the shorts. The bottom stripe was a little bit of a cuff-like construction, sandwiching lace in between, to get the cleanest possible result. The stripes proved a bit tricky to line up because I had chosen fabric with stretch. The side that is visible is a tad off, but it’s not glaringly obvious.
I had a moment of self doubt and messed up the zipper installation using my machine. It's a very small imperfection though – I'm SUPER happy with how the shorts turned out!
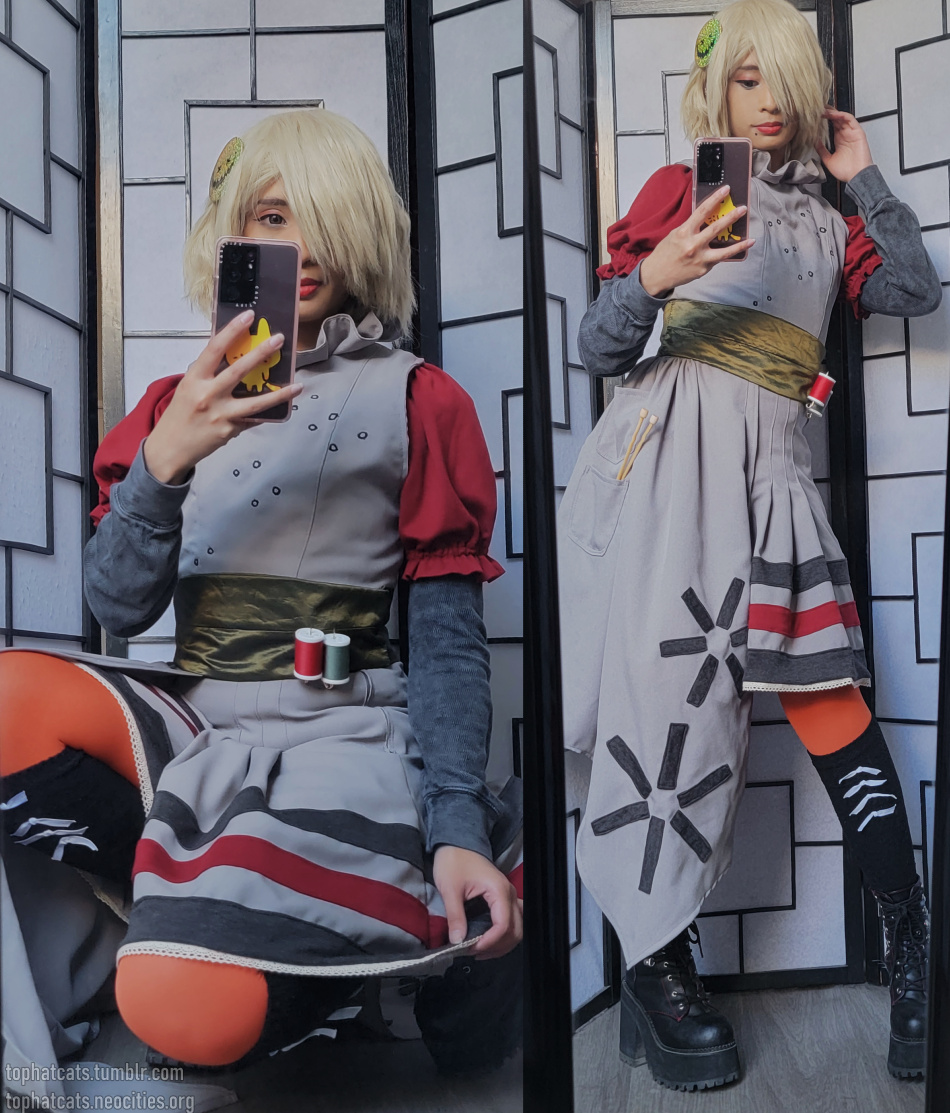
Vest
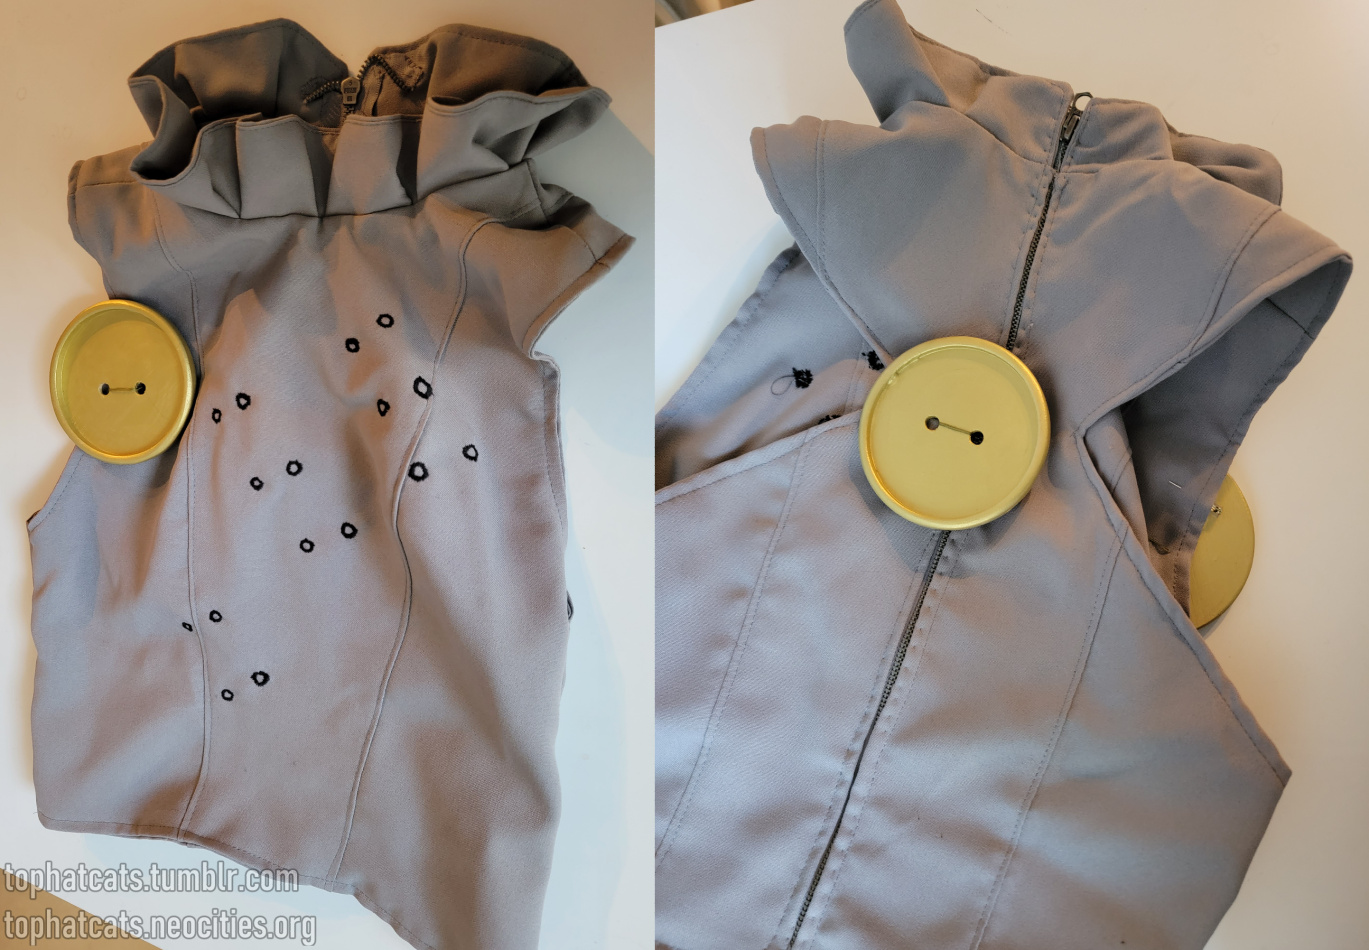
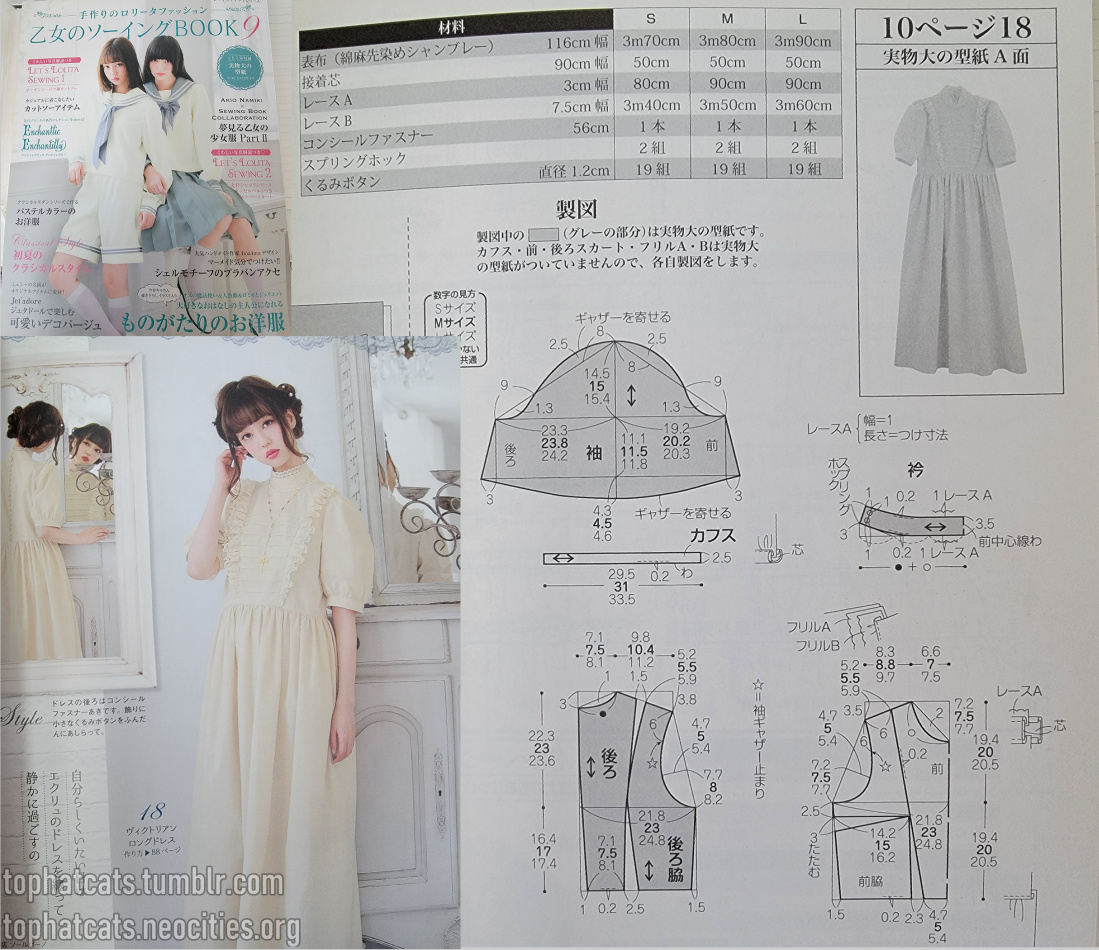
vest: modified dress top from Otome no Sewing volume 9, pattern 18
I used this pattern from Otome no Sewing as the base due to the back zip design and collar style. I made a mockup so I could adjust the armhole cuts and the hourglass cut for the back. I modified the original collar pattern to be taller and built in some box pleats.
I waited until I had the belt completed so I could place the buttonhole embroidery designs. I know I could have done the embroidery better, but I just went for it freehand in my speedrunning stupor. It’s messy, but it will do. It’s fine enough for photos.
Belt
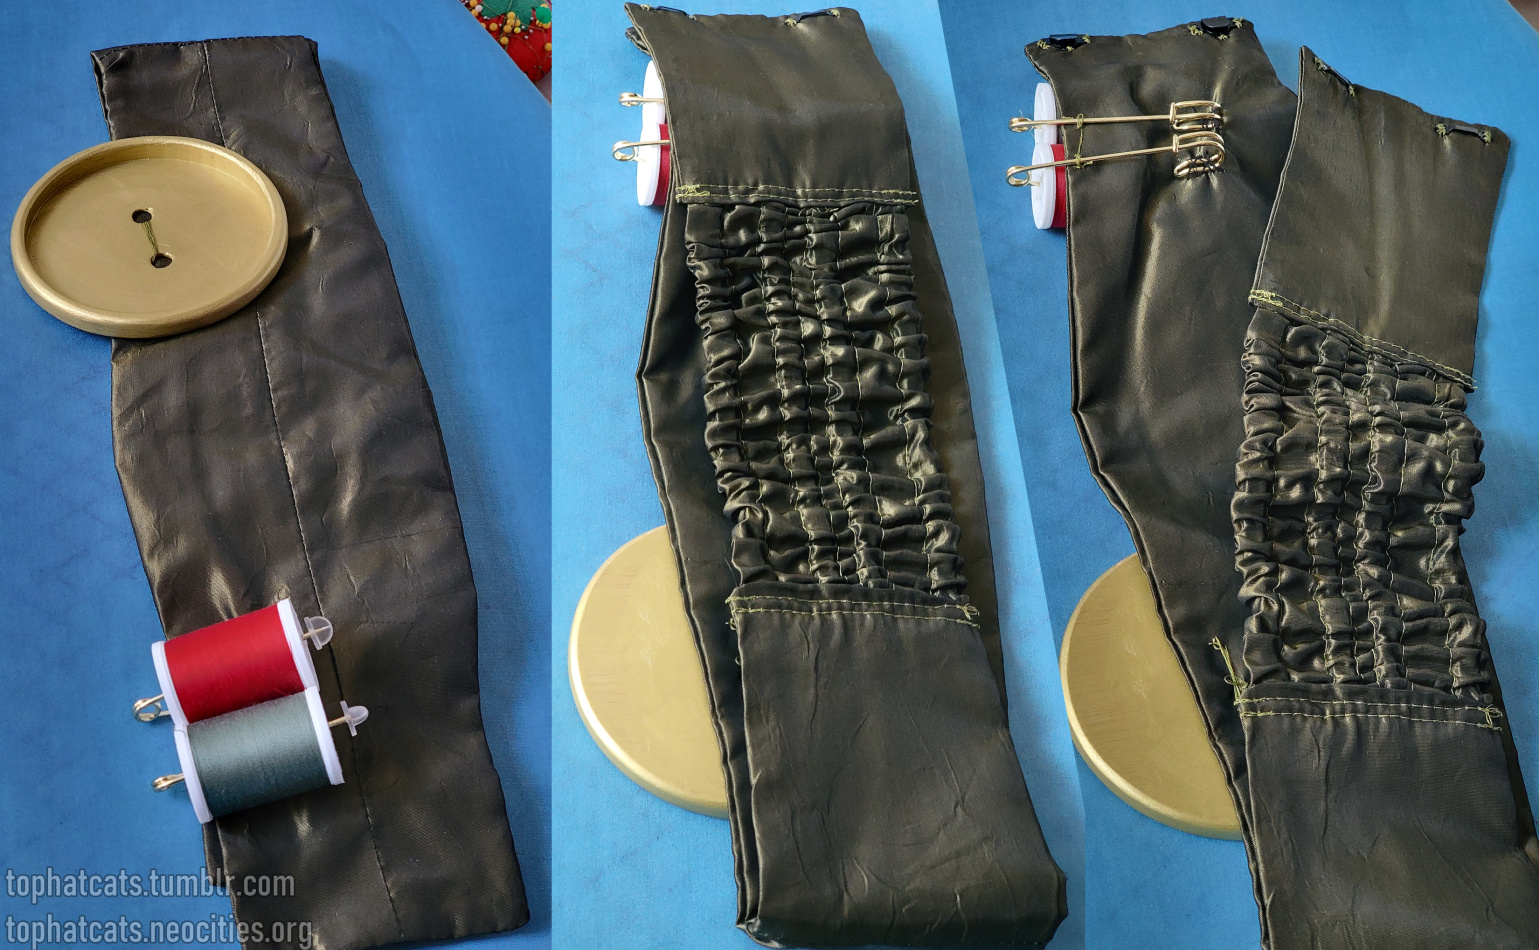
Belt (L to R): front, back, inside construction
The pattern base I used is from a skirt waist piece. I looked to my Otome no Sewing books for ideas, but ultimately I wanted something simple but with a bit of stretch. I think the taffeta looks really nice when it catches the light or gets scrunched with the elastic, but it was a pain to work with. It’s not very forgiving with being punctured, so it looks a bit more beat-up close.
I went with standard spools because the size worked perfectly with the giant skirt pins I used to hold them in place. The pointy end of the pins are covered with clear enamel pin backing pieces. They hold the spools secure enough for convention walking.
When worn with all the other layers, the spool holders work well enough. I wish I had planned for a stiffer inner support layer for the belt itself to reduce the slight warping with the weight.
Pattern Mockup WIPs
Leftover broadcloth mockup for shorts, vest, and belt
Unflattering late-night WIP photo time! Mockups for the pieces mentioned above. I had enough leftover cheap broadcloth from old projects to put these together and adjust accordingly. You can see the stripe placement marks made on one half of the shorts and adjustments made to the back cut of the vest.
Side Apron
higher res spin clip on my tumblr
I wanted to give this as much volume as possible for maximum twirl and butt cape mileage. I drew up a rough pattern and made a mockup to test the amount of gathering, placement of the pleats, etc. (No WIP pictures, sorry!) I went with a simple side-tie, and it held very secure with the fabric type. The pocket pattern I took from a Otome no Sewing pattern and free-handed the placement.
I think my star pattern is a bit simplified compared to the intended design, but this was my very last bit of sewing so I didn’t care too much. The grey fabric had stretch, so I spent a lot of time ironing and baste stitching the 12 individual rectangle pieces before top stitching them on.
Giant Buttons
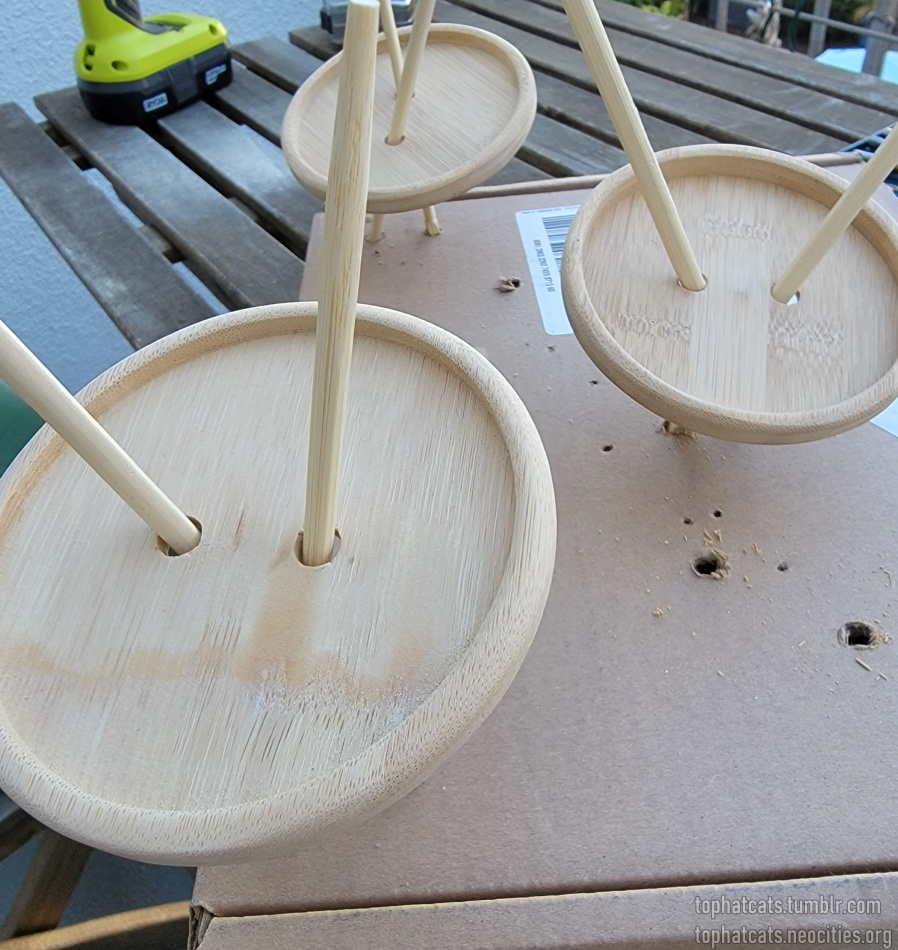
pre-painted coaster buttons
I spent a lot of time trying to think of what to use as a base for these, and in the end I settled with these bamboo coasters from the craft store. My partner offered to help with sanding them and drilling them. They are a tad heavy, but they turned out very nice. I originally thought two broach pins superglued to the back would suffice, but I ended up sewing them directly to the outfit pieces to really secure them for convention chaos.
Accessories, Wig, and Makeup
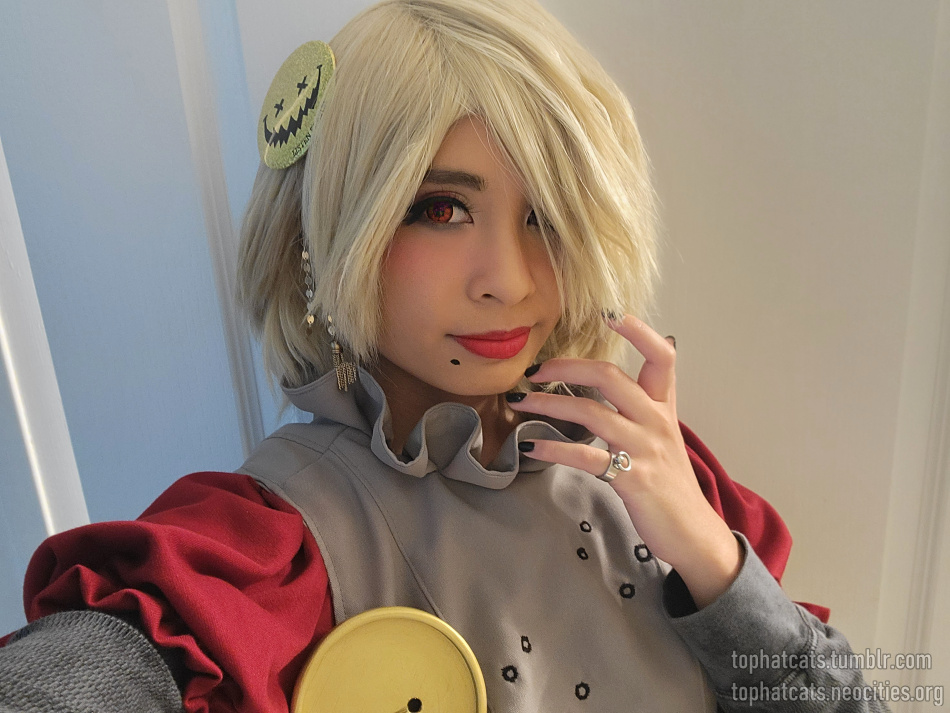
!!!
Monster face hair pin: I know this guy should be orange for accuracy, but I got this aluminum badge from a Listen Flavor lucky pack ages ago and it's perfect otherwise.
The earrings are some diy crafting.
The wig: This was towards the end, and I was getting exhausted. My approach was haphazard: cut and style the wig while wearing it, YAY. I did not have the patience to properly curl the pieces that needed it. (I told myself I am leaning into the setting/character.)
Final Cosplay
Thank you for reading!